Scan2Ship Support Documentation
Type in your question to find relevant topics
Print Dialog Box Bypass Function
Table of Contents
This function allows you to bypass the print dialogue box that appears when printing labels. At its default, Scan2Ship requires the user to scan the barcode invoice twice (1st scan: initiates label printing, 2nd scan: confirms print request via printer dialogue box). Setting up the Print Dialogue Bypass Box (PDBB) function overrides the need to scan the barcode twice, allowing for only a single scan to print shipping labels.
*IMPORTANT: Setting up PDBB creates an Edge/Chrome desktop browser shortcut that defaults all printing to the label printer. Do not use this desktop browser shortcut for regular internet browsing, as any attempt to print from it will automatically default to your label printer. Once you have set up your PDBB desktop shortcut, it is recommended to rename the shortcut ‘Scan2Ship’
Microsoft Edge: Set up Print Dialogue Bypass (PDBB)
Step one:
- Right click on your Microsoft Edge shortcut found on your desktop.
- Click Show More
- Click Create Shortcut
- Move the shortcut to an unused portion of your desktop.
Step two:
- Open a window from the newly created Microsoft Edge or Chrome shortcut.
- Click the three dots located on the top right side of the window.
- Find the Print button and click on it.
- Select your Label Printer.
- Click on the cancel button.
Step three:
- Right-click the Edge icon on your desktop
- Click the Show More Options button
- Click on Properties
- Look for the Target window-delete the code in the Target box
- Replace Target data with this custom code. Make sure there are no spaces before or after you copy and paste this entire line of code and include the quotation marks:
“C:\Program Files (x86)\Microsoft\Edge\Application\msedge.exe" --kiosk-printing --edge-kiosk-type=fullscreen --no-first-run https://admin.shopify.com”

Step four:
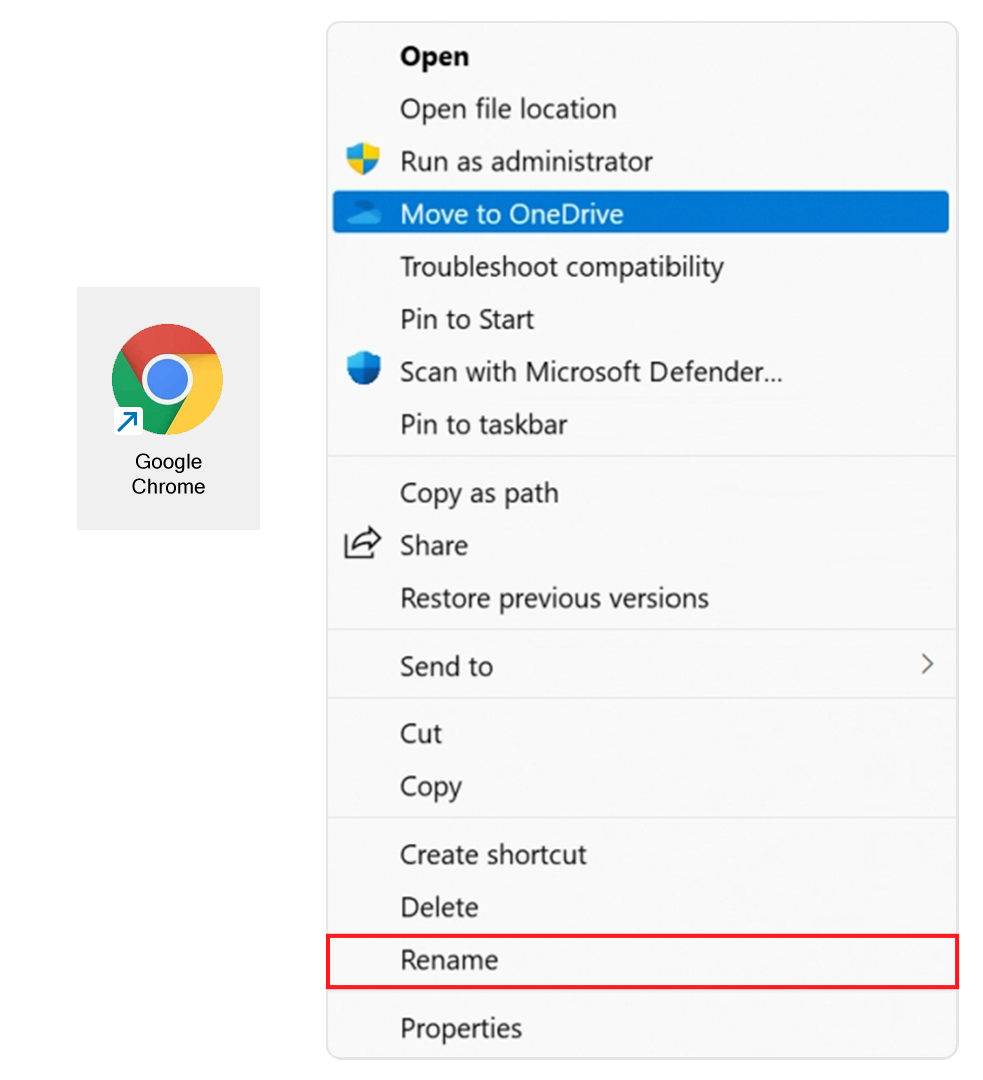
- Rename the Shortcut by clicking on the newly created shortcut on the name Google. The name will become editable. Change the name to this shortcut to Scan2Ship. Click anywhere on the desktop to complete the edit.

Google Chrome: Set up Print Dialogue Bypass (PDBB)
Step one:
- Right click on your Chrome shortcut found on your desktop.
- Click Show More
- Click Create Shortcut.
- Move the shortcut to an unused portion of your desktop.
Step two:
- Open a window from the newly created Chrome shortcut.
- Click the three dots located on the top right side of the window.
- Find the Print button and click on it.
- Select your Label Printer.
- Click on the cancel button.
Step three:
- Right-click the same CHROME shortcut icon on your desktop
- Click the Show More Options button
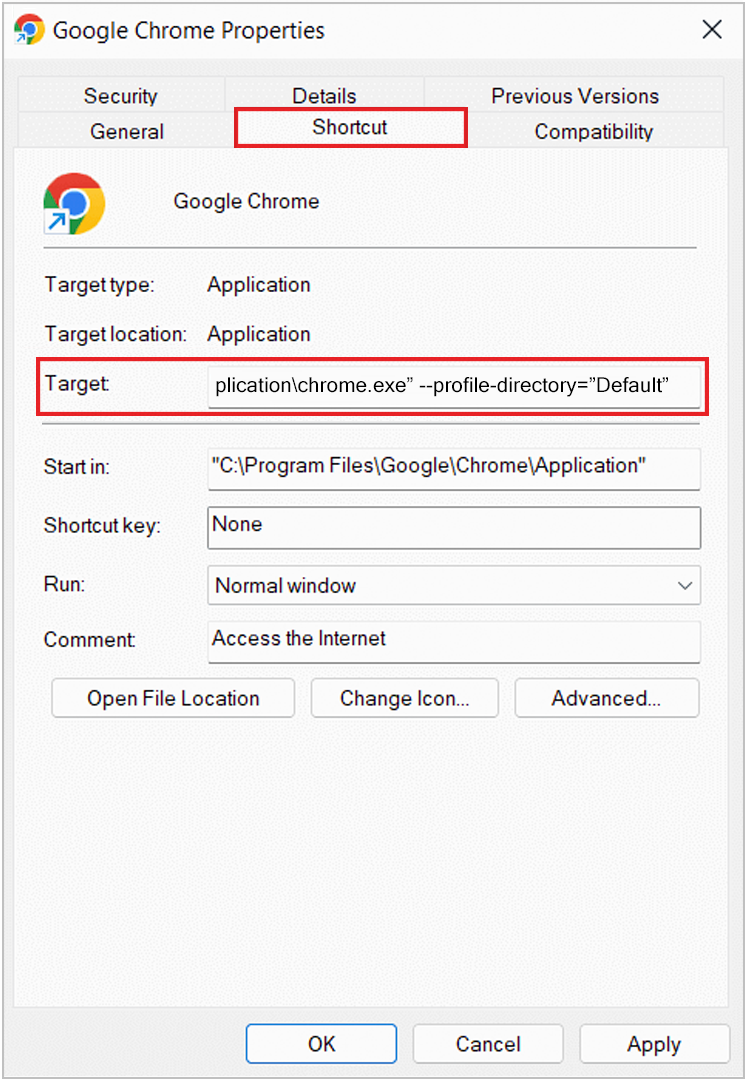
- Click on Properties
- Look for the Target window-delete the code in the Target box
- Replace Target data with this custom code:
- Right-click the Chrome icon on your desktop
- Click the Show More Options button
- Click on Properties
- Look for the Target box-delete the code in the Target box
- Replace Target data with this custom code. Make sure there are no spaces before or after you copy and paste this entire line of code and include the quotation marks Video capture of setting up Silent printing for Chrome. (video link):
"C:\Program Files\Google\Chrome\Application\chrome.exe" --kiosk-printing https://shopify.com"
- Click on Apply, then OK
Video showing Edge Print Dialogue Box Bypass: https://youtu.be/JtDmLQz42qA
Step four:
- Rename the Shortcut by clicking on the newly created shortcut on the name Google. The name will become editable. Change the name to this shortcut to Scan2Ship. Click anywhere on the desktop to complete the edit.
- Choosing a selection results in a full page refresh.
- Opens in a new window.